How to Enable or Disable App Names in Outlook App
This guide explains how to show or hide the names of your apps in the new Outlook for Windows 11.
What is the new Outlook app?
The new Outlook is a fresh version of the classic email and calendar tool. It features a clean, modern look to help you manage your daily tasks. It supports showing week numbers in Outlook calendar, deleting your search history, exporting your search history, adding or removing events from emails to your Calendar, switching to dark mode, link preview, sounding alerts for notifications, turning on or off notifications when Outlook is closed, enabling or disabling colorful app icons, and many other services.
Why show app names?
By default, Outlook hides the text labels for your apps to keep the screen simple. You might want to turn these labels on if you find it hard to identify the icons. Showing the names makes it easier to know exactly which section you are clicking.
What happens when you are done?
Once you finish these steps, your Outlook navigation bar will display the text labels next to each icon, making your workspace easier to navigate.
How to turn “Show app names” on or off
- Open the Outlook app from your Start menu or taskbar.

- Click the Settings gear icon located at the top right of the menu bar.

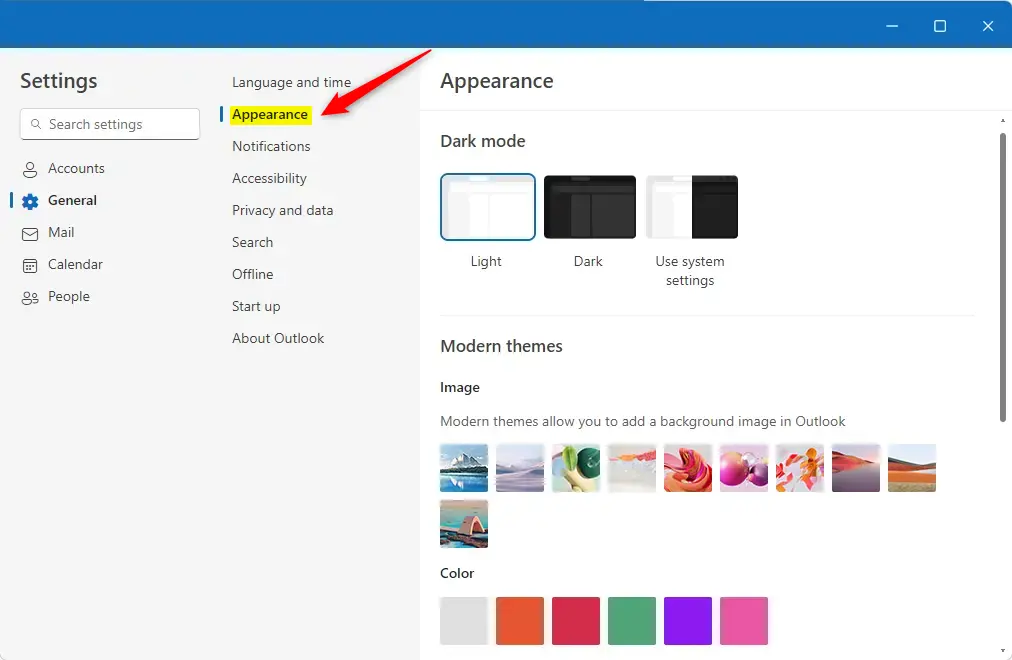
- In the Settings menu, click General.
- Select Appearance to see your display options.
- Find the Navigation bar section.
- Use the toggle switch to turn Show app names on or off.
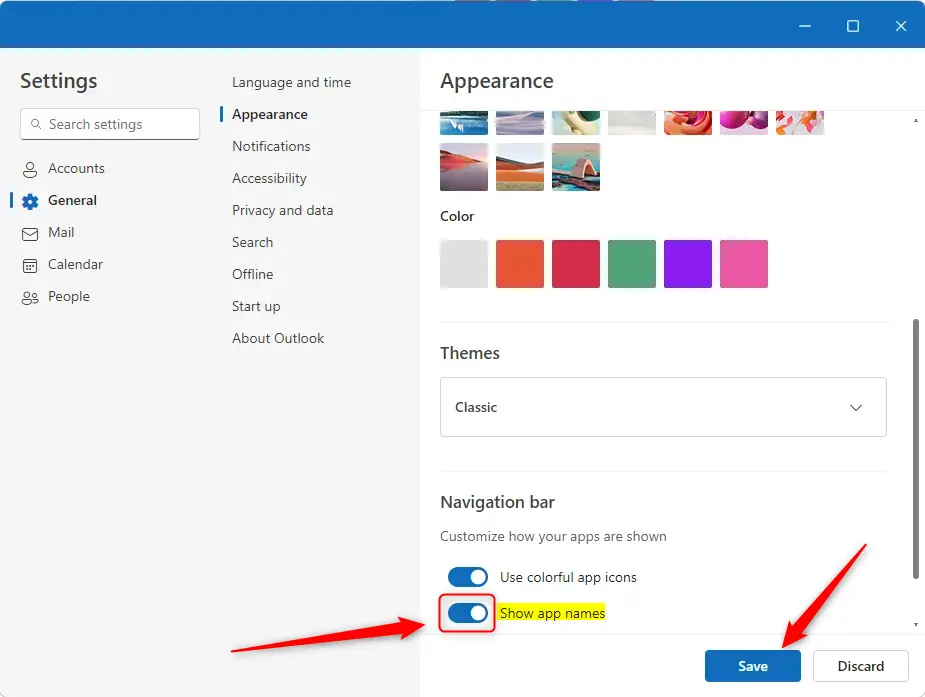
- Click the Save button to apply your changes, then close the settings window.


-
Summary
- The “Show app names” feature adds text labels to your icons to make them easier to identify.
- You can toggle this feature by going to Settings > General > Appearance.
- Always click Save to make sure your changes stick.
- Personalizing your Outlook layout helps you work faster and keeps your workspace organized.
How do I enable app names in the Outlook app?
Can I disable the 'Show app names' feature in Outlook?
Where can I find the Appearance settings in Outlook?
What is the benefit of showing app names in Outlook?
Do I need to save changes after adjusting settings in Outlook?
Was this guide helpful?


Leave a Reply Cancel reply